Contact us

LED Light Flasher using IC555 Time

500.00

Availability: In Stock
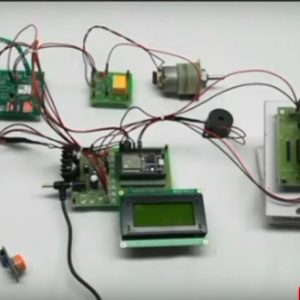
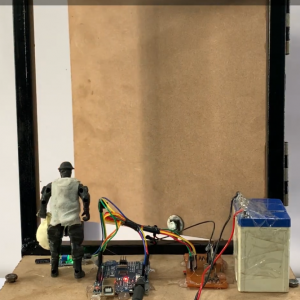
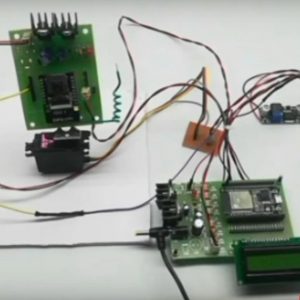
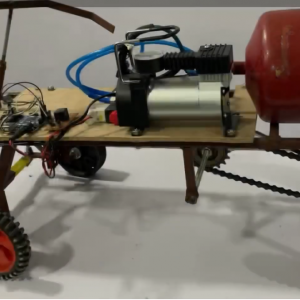
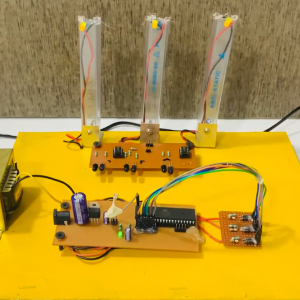
Circuit Design:

  1. 555 Timer Connections:
    • Connect the VCC pin (pin 8) of the 555 timer to the positive supply voltage (e.g., 9V).
    • Connect the GND pin (pin 1) of the 555 timer to the ground (0V) of the circuit.
  2. Astable Mode Connections:
    • Connect the Trigger (pin 2) and Threshold (pin 6) pins together.
    • Connect a resistor (e.g., 10kΩ) between the Trigger/Threshold pins and the Discharge (pin 7) pin.
    • Connect a capacitor (e.g., 10μF) from the junction of the Trigger/Threshold pins to the ground.
    • Connect another resistor (e.g., 100kΩ) from the Discharge (pin 7) to the VCC.
  3. LEDs and Transistors:
    • Connect the output (pin 3) of the 555 timer to the base of an NPN transistor (e.g., 2N3904).
    • Connect the emitter of the transistor to the ground.
    • Connect the collector of the transistor to the anodes of the LEDs.
    • Connect the cathodes of the LEDs to the positive supply voltage through current-limiting resistors (e.g., 330Ω).

Working Principle:

  • The 555 timer is configured in astable mode, generating a continuous square wave at the output (pin 3).
  • The square wave alternates between high and low states, creating a flashing effect.
  • The transistor acts as a switch, turning on and off based on the square wave signal.
  • When the transistor is on, current flows through the LEDs, causing them to light up.
  • When the transistor is off, the LEDs are not illuminatedCircuit Design:
    1. 555 Timer Connections:
      • Connect the VCC pin (pin 8) of the 555 timer to the positive supply voltage (e.g., 9V).
      • Connect the GND pin (pin 1) of the 555 timer to the ground (0V) of the circuit.
    2. Astable Mode Connections:
      • Connect the Trigger (pin 2) and Threshold (pin 6) pins together.
      • Connect a resistor (e.g., 10kΩ) between the Trigger/Threshold pins and the Discharge (pin 7) pin.
      • Connect a capacitor (e.g., 10μF) from the junction of the Trigger/Threshold pins to the ground.
      • Connect another resistor (e.g., 100kΩ) from the Discharge (pin 7) to the VCC.
    3. LEDs and Transistors:
      • Connect the output (pin 3) of the 555 timer to the base of an NPN transistor (e.g., 2N3904).
      • Connect the emitter of the transistor to the ground.
      • Connect the collector of the transistor to the anodes of the LEDs.
      • Connect the cathodes of the LEDs to the positive supply voltage through current-limiting resistors (e.g., 330Ω).

    Working Principle:

    • The 555 timer is configured in astable mode, generating a continuous square wave at the output (pin 3).
    • The square wave alternates between high and low states, creating a flashing effect.
    • The transistor acts as a switch, turning on and off based on the square wave signal.
    • When the transistor is on, current flows through the LEDs, causing them to light up.
    • When the transistor is off, the LEDs are not illuminated.

Product Description

Reviews

There are no reviews yet.

Be the first to review “LED Light Flasher using IC555 Time”